|
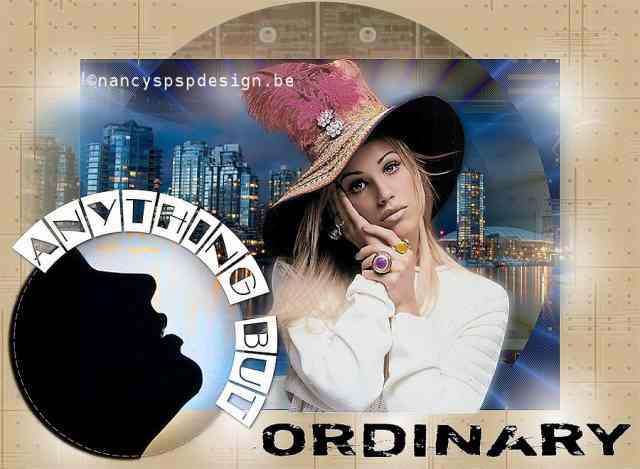
Anything but ordinary
You can find the
materials here. Thanks to the artists
and the tubers for their hard work. The tubes are from
sassyillusions, dragonblu
and MCC (MCC shares her tubes at Resistire
Shares). Supplies: Preparation :
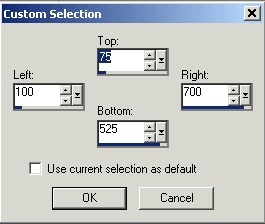
Take the arrow to know where you are in the tutorial. 1. File, new image 800 x 600 pixels transparent and rename this layer background 2. Put your foreground color to #406fc0 and the background color to #0d2c68 3. Selection, Custom
selection 4. as follows 5. Fill with foreground color 6. Right-click on your layer palette, Promote selection to layer 7. Fill with dark background color (right mouse button) 8. Effects, plug-ins,
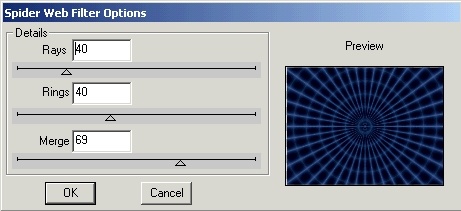
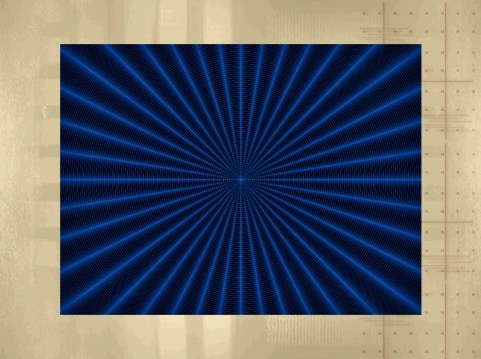
DSB Flux, Spider Web as follows 9. Adjust, Brightness
and Contrast, Clarify 15 10. Layer palette, blend mode, Luminance (old) 11. Selections, Invert 12. Right-click on your layer palette, Promote selection to layer 13. Put this layer as bottom layer 14. Fill with color #ead9b2 15. Layers, Duplicate 16. Open the backgroundscrap3_pnl, Copy and paste into selection 17. Layer palette, blend mode, Luminance (old) and reduce the opacity to 31% 18. Selections, select none 19. Layers, New raster layer 20. Put your foreground color to #b5966f 21. Load the brush
vcbrush40 001 as follows and place to the
right as follows 22. Layers, Duplicate 23. Image, Mirror 24. Layers, Merge, Merge down 25. Select the top layer in your layer palette 26. Make this layer invisible by clicking the visibility toggle (the eye) in your layer palette 27. Click with the magic wand in the blue part 28. Make the top layer visible again 29. Layers, New raster layer 30. Take the tube blue night bridge, select the bottom bridge and paste into selection 31. Layer palette, blend mode, Screen and Opacity 91% 32. Selections, select none 33. Open background 12801_015 34. Right-click in your layer palette on the background layer (of 12801_015) and select Promote Backgound Layer 35. Effects, plug-ins,
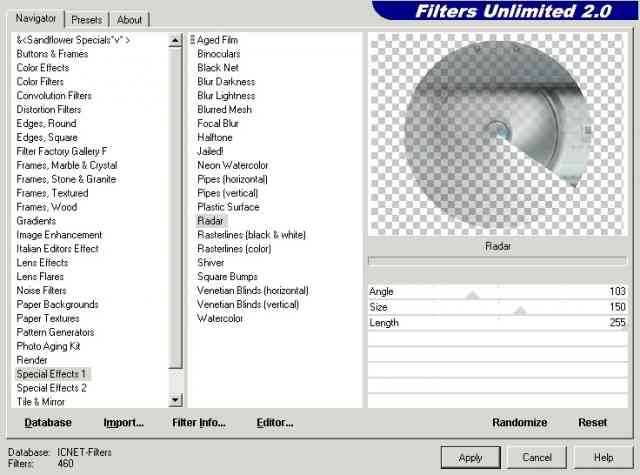
I.C. NET Software, Filters Unlimited 2.0, Special Effects 1, Radar,
standard settings 36. Image, Resize,
62% 37. Edit, Copy, paste as new layer 38. Layer palette, blend mode, Difference 39. Layers, New raster layer 40. Selections, Select All 41. Selections, Modify, Contract 25 pixels 42. Open the tube decobulles, copy, paste into selection 43. Selections, Select none 44. Layer palette, blend mode, Screen and opacity at 75% 45. Open the tube Mist_Scenery265_dragonblu0508 46. Image, Resize, 120% 47. Edit, Copy, paste as new layer 48. Open the tube half moon-the goddess and select the layer Capa 2 49. Image, Resize, 65% 50. Copy and paste as new layer 51. effects, image
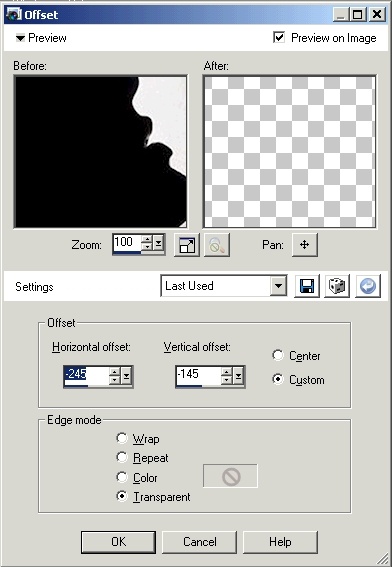
effects, offset, horizontal -245, vertical -145 52. Layer palette, blend mode, Luminance (old) 53. Layers, new raster layer 54. Select in the
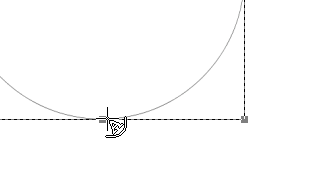
toolbar Tools the ellipse tool 55. Place this circle
as shown below 56. Objects, Convert to path 57. Select Text
tool and en choose the font a_BentoCm, size 45 pixels 58. Switch your background color to white and lock the foreground color 59. Position the
cursor over the line of the circle so that you can see a curved
line below the 'A' 60. Type your text. As you can see, the text follows the shape of the circle. 61. Use your Move Tool to position the text at the right place. 62. Make the path
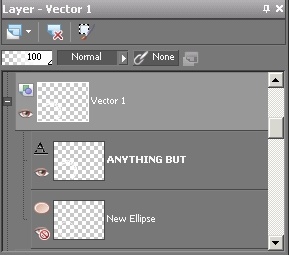
(the circle you have drawn) invisible by clicking the visibility
toggle (the eye) in your layer palette 63. Right-click in your layer palette on the textlayer (Vector). Convert to raster layer 64. Effects, 3D-effect,
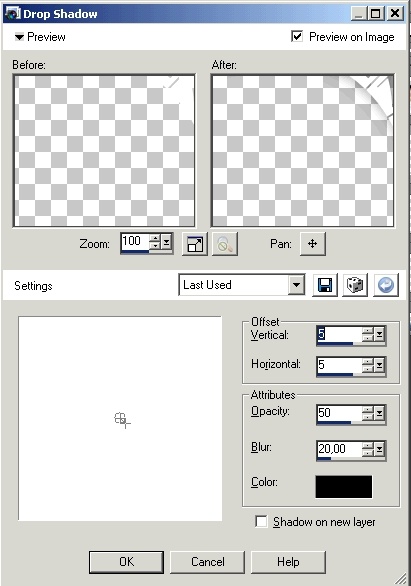
Drop shadow as follows 65. Layers, New raster layer 66. Switch your background color to black and lock the foreground color 67. Activate the text tool again and choose the font Shortcut, size 70 pixels 68. Type your text and stretch horizontally to have a nice effect 69. Effects, 3D-effects, Drop shadow with the same settings as above 70. Layer palette, blend mode, Burn 71. Open the tube sassyillusions_blonde15 72. Image, Resize, 85% 73. Copy and paste as new layer 74. Use your Move Tool to position the tube 75. Layers, Duplicate 76. Select the bottom layer of these two layers 77. Adjust, Blur, Gaussian blur, 20 78. Image, Add borders, 3 pixels, color #b5966f 79. Effects, Plug-ins,
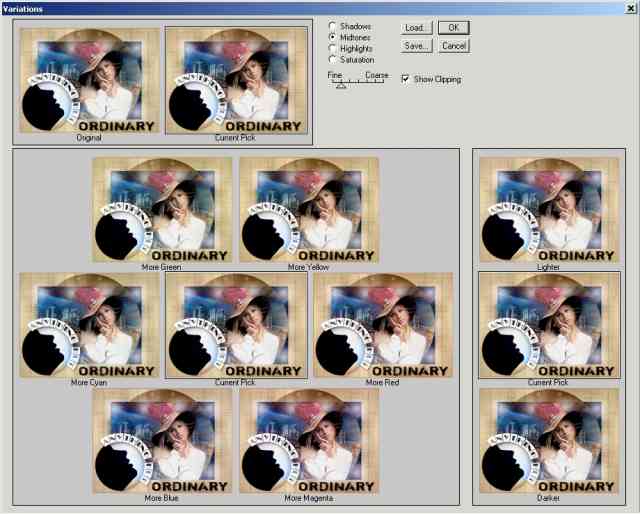
Adjust variations, midtones checked and fine 1 mark. Click original
once, 1x more red 80. Effects, Plug-ins,
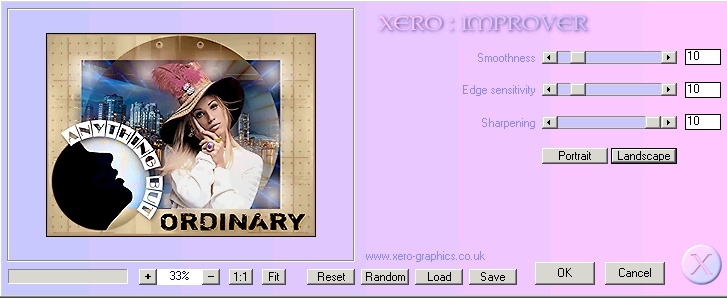
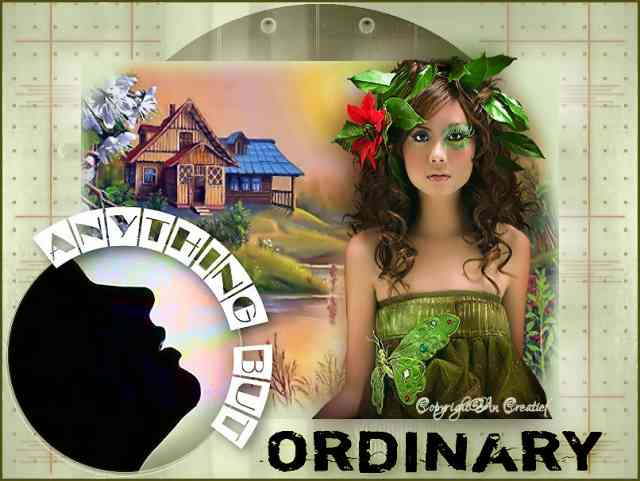
Xero improver, 10 -10 -10 landscape 81. Don't forget your signature and save as jpg. This is an extra example made by An Creatief
Lesson Anything but ordinary was written on september 11, 2008
This site is © Copyright Nancyspspdesign.be 2007-2008, All Rights Reserved |
|
| ar |