|
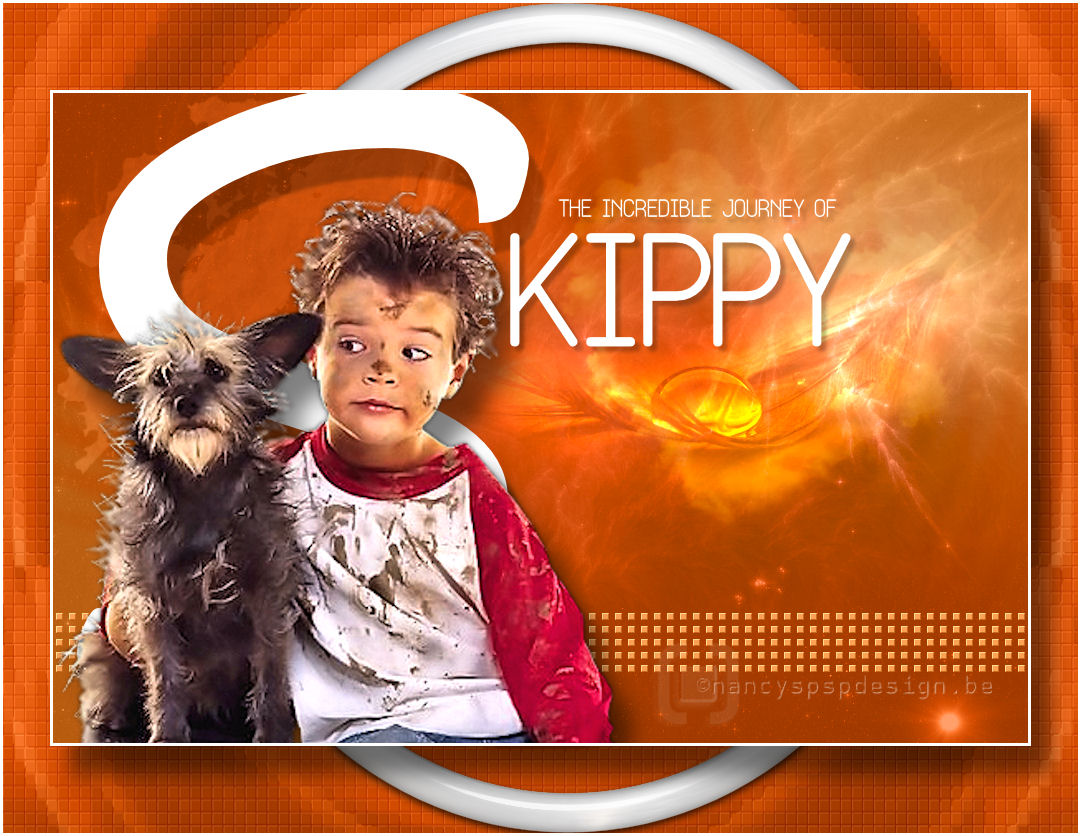
Skippy
You can find your materials here. The tubes are from MDS, LCT and Marif. Supplies: Filter Mura’s Meister, Copies, here Preparation :
1. File, New image, 975 x 650 pixels, transparent
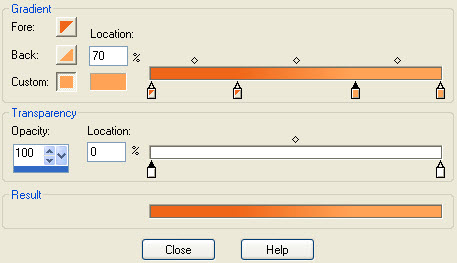
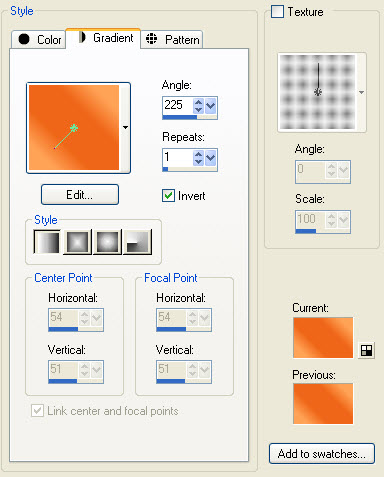
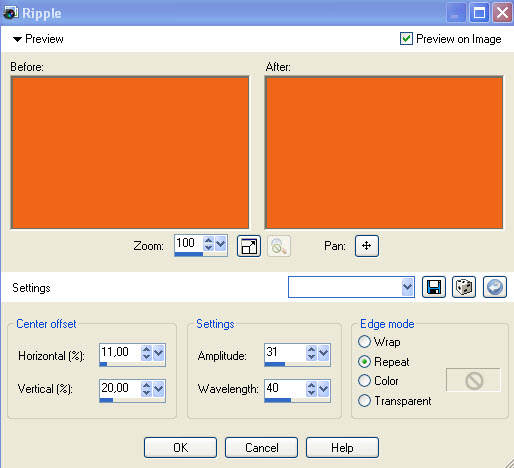
4. Flood fill your layer with your gradient 5. Effects, Distortion effects, Ripple, as follows 6. Open the image Cauldron Nebula Stock 7. Copy and paste as new layer 8. In your layer palette, reduce the opacity to 40% and set the blend mode to Luminance (Legacy) 9. Layers, Merge, Merge down 10. SHIFT + D to make a copy and put it aside. 11. Layers, New Raster Layer 12. Draw a random rectangle and change the settings as follows
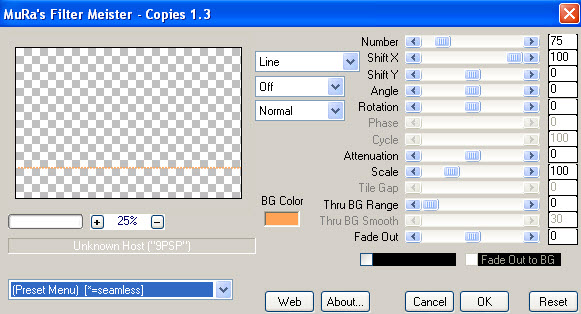
13. Effects, Plugins, MuRa’s Meister, Copies as follows
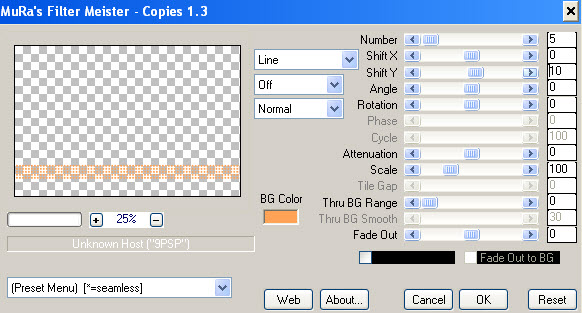
14. Repeat Effects, Plugins, MuRa’s Meister, Copies but now with these settings
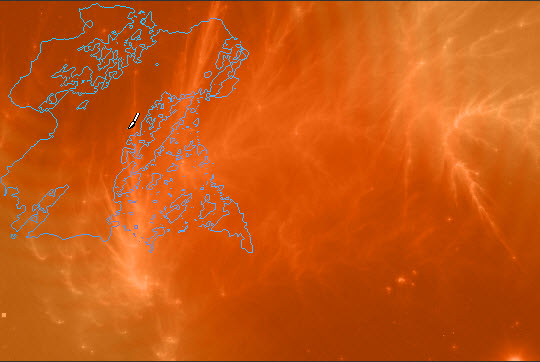
15. Effects, Plugins, Filters Unlimited, Convolution Filters, Emboss (light, inverse) 191 16. Layers, New Raster Layer 17. Put the brush Blaze-deteriorated2_Grunge, size 420, in the left upper corner by clicking your left mouse button (foreground gradient)
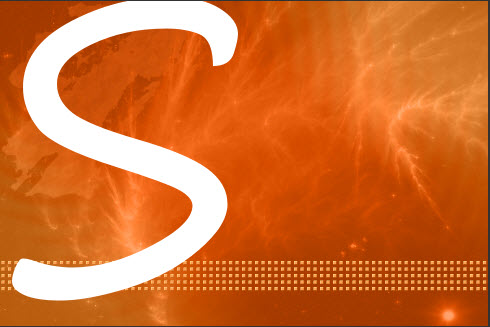
18. Lock your foreground color, background color white 19. Activate the text tool and choose the font Segoe Print, size 800 pixels, type the capital S en put it as shown below
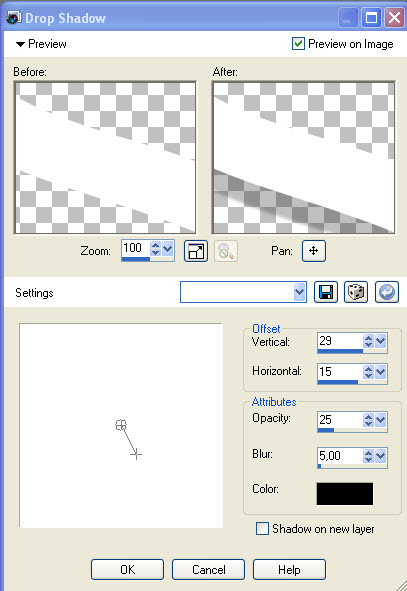
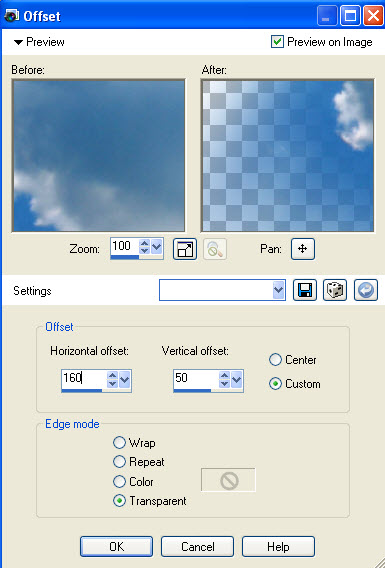
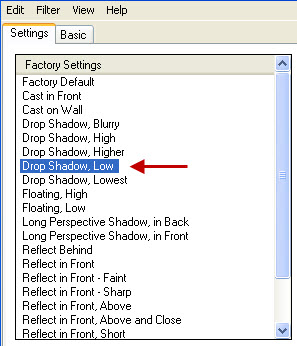
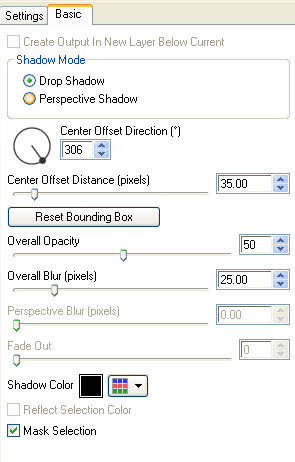
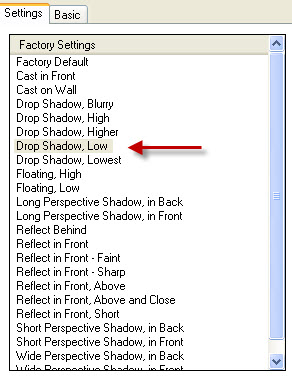
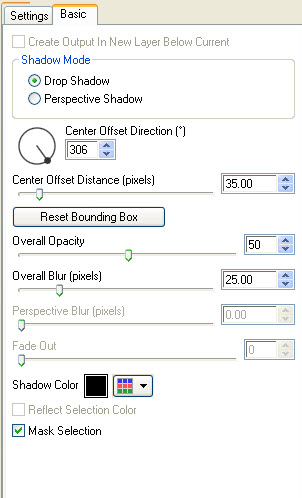
20. Layers, Convert to Raster Layer 21. Effects, 3D-Effects, Drop shadow as follows 22. Open the image mds7979 Heart Cloud 23. Image, Resize, 170% 24. Copy and paste as new layer 25. Effects, Image Effects, Offset as follows 26. In your layer palette, set the blend mode to Soft Light 27. Open the image Marif_2007_07Juillet_misted_decor0194 28. Image, Resize, 110% 29. Copy and paste as new layer 30. Effects, Image effects, Offset, 210 85 31. In your layer palette, set the blend mode to Dodge 32. Open the tube will_they_notice_LCT_01_08 33. Image, Resize, 165 % 34. Copy and paste as new layer 35. Put the tube in the left bottom corner 36. Effects, Plugins, Alien Skin, Eye Candy 5, Impact, Perspective Shadow, as follows
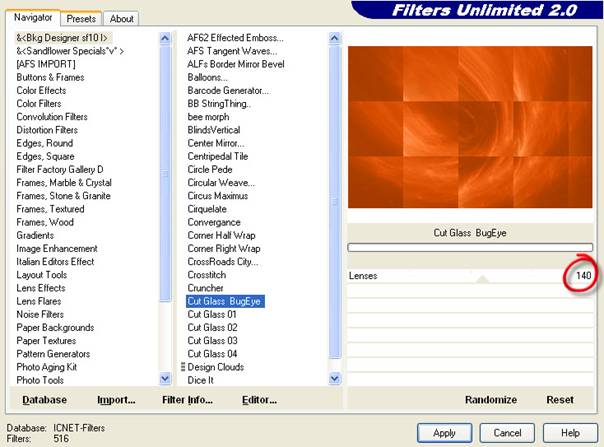
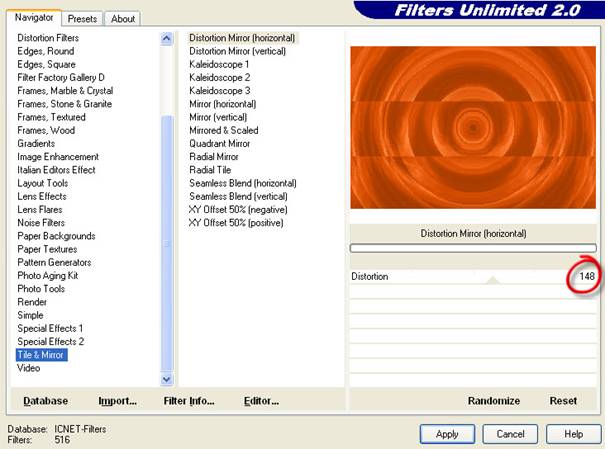
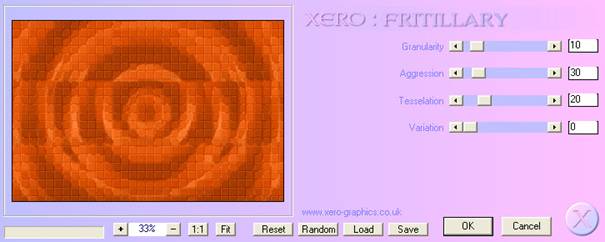
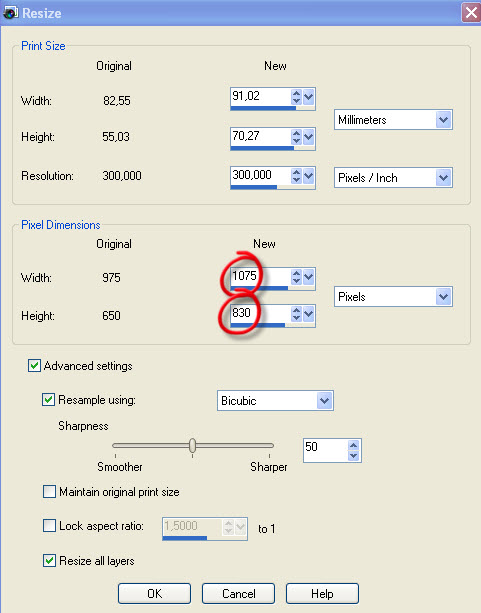
37. Activate the text tool and choose the font Base4, size 130 pixels 38. Type KIPPY and put your text at the right place 39. Layers, Convert to Raster Layer 40. Effects, 3D-effects, Drop shadow, 5 5 25 5 41. Reduce the size to 20 pixels and type the other text 42. Effects, 3D-effects, Drop shadow, 5 5 25 5 43. Layers, Convert to Raster Layer 44. Image, Add borders, 3 pixels, white 45. Effects, Plugins, Filters Unlimited, Color Filters, Color Booster, 14 46. Open the background from step 10 47. Layers, Merge, Merge all (This is necessary, otherwise the following plugins won't work properly) 48. Effects, Plugins, Filters Unlimited, &<Bkg Designer sf10 l> Cut Glass BugEye as follows 49. Effects, Plugins, Filters Unlimited, Tile & Mirror, Distortion Mirror (horizontal) as follows 50. Adjust, Blur, Gaussian blur, 3 51. Effects, Plugins, Xero, Fritillary 52. Image, Resize as follows 53. Lock your background color and put your foreground color to white 54. Draw a random ellipse with the following settings
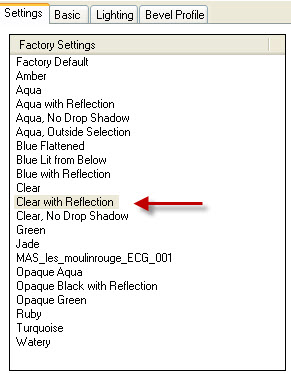
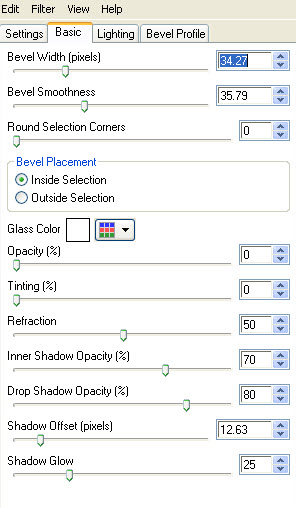
55. Layers, Convert to Raster Layer 56. Effects, Plugins, Alien Skin Eye Candy 5: Impact, Glass as follows
57. Now, go back to your work from step 45 58. Copy and paste as new layer in your background 59.Effects, Plugins, Alien Skin Eye Candy 5: Impact, Perspective Shadow as follows
60. Image, Add borders, 3 pixels, white 61. Don't forget your signature and save as jpg.
This is an extra example made by An Creatief. She found her inspiration in the spirit of Christmas.
Lesson Skippy was written on November 28, 2010
This site is © Copyright Nancyspspdesign.be 2007-2011, All Rights Reserved |
|
| ar |