|
Transcendence
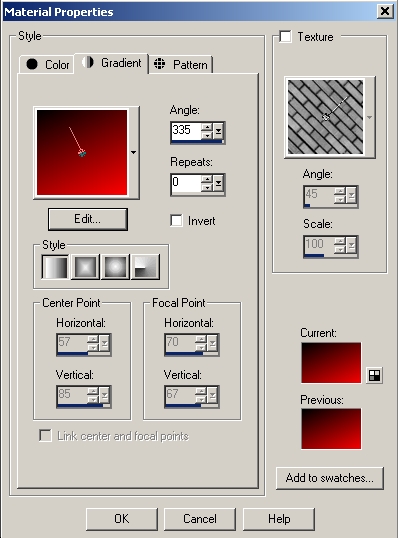
You can find your materials here. Supplies: Preparation : Take the arrow to know where you are in the tutorial. 1. File, New Image, 800 x 600 pixels, transparent 2. Put the foreground color to black and the background color to red (FF0000) 3. Make a foreground / background gradient with your colors and use these settings
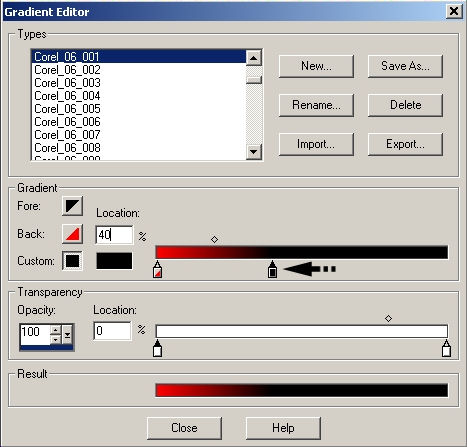
Edit your gradient to make complementary changes
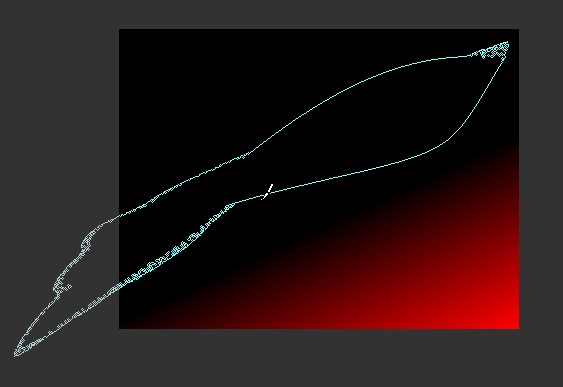
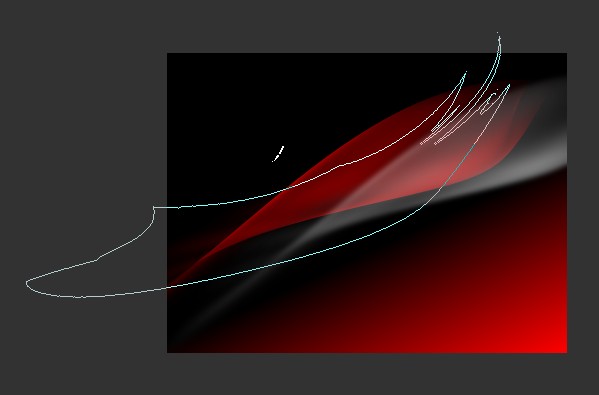
4. Flood fill your layer with your gradient 5. Layers, New Raster Layer 6. Switch foreground and background color. The foreground color is now red. 7. Load the brush dream_design_by_ghost_fight3r_1 and put it as shown on the example (reduce your worksheet to view the whole brush)
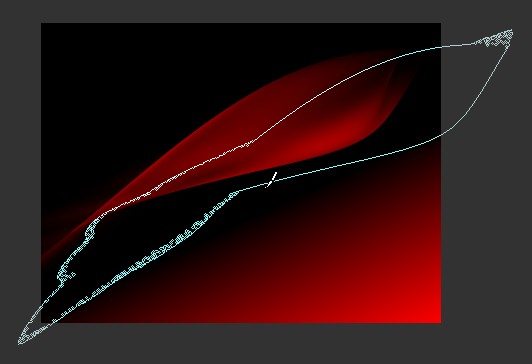
8. Layers, New Raster Layer 9. Put foreground color to white 10. Use the same brush again and put it as shown on the example
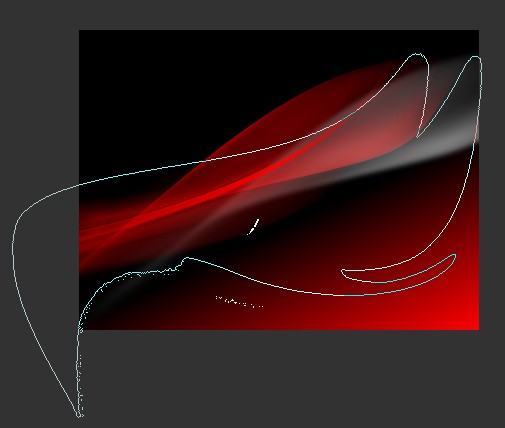
11. Reduce in your layer palette the opacity to 75% 12. Adjust, Blur, Gaussian blur 5 13. Effects, 3D Effects, Drop Shadow, as follows (-50, 50, 50, 25, black) 14. Switch the foreground color back to red 15. Layers, New Raster Layer 16. Load the brush dream_design_by_ghost_fight3r_10 and put it as shown on the example
17. Effects, 3D Effects, Drop Shadow, same settings as step 13 18. Switch the foreground color back to white 19. Layers, New Raster Layer 20. Load the brush dream_design_by_ghost_fight3r_6 and put it as shown on the example
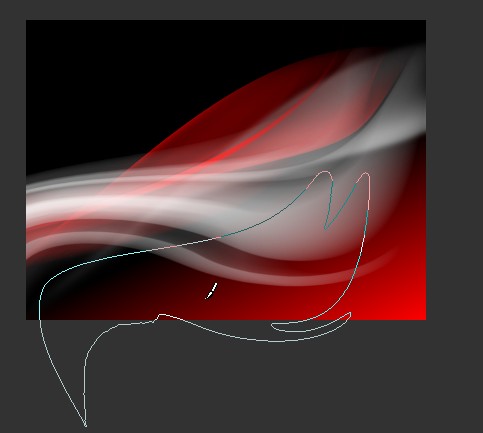
21. Use this brush a second time, but reduce the size to 665 pixels and put it as shown on the example
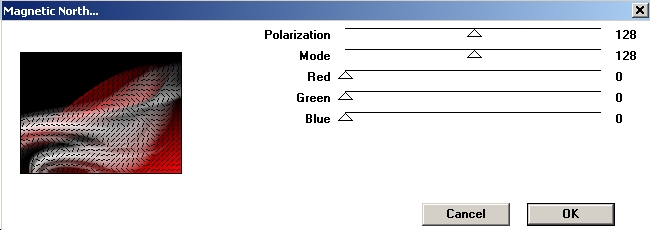
22. Merge, Merge All 23. Effects, Plugins, Filter Factory Gallery Q, Magnetic North as follows
24. SHIFT + D to make a copy of the image and put it aside.
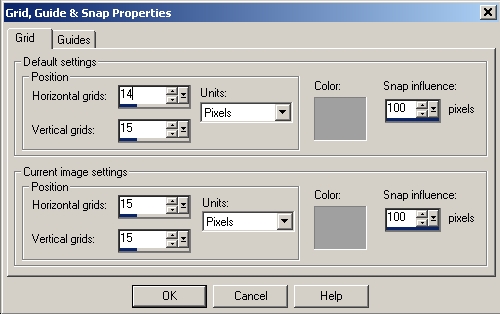
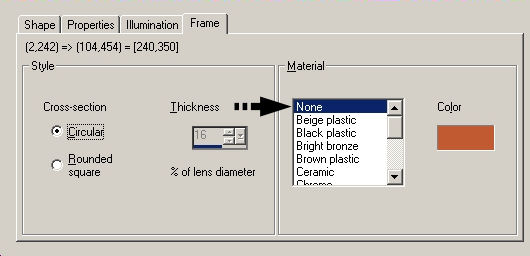
25. Lock your foreground color and put your background color to white 26. Draw a random rectangle 27. Change the settings in your tool options palette as follows 28. Layers, Convert to Raster Layer 29. View, Grid 30. View, Change Grid, Guide & Snap Properties
31. Zoom 250 % to see the guidelines clearly 32. Pick Tool (K), Modus, Shear
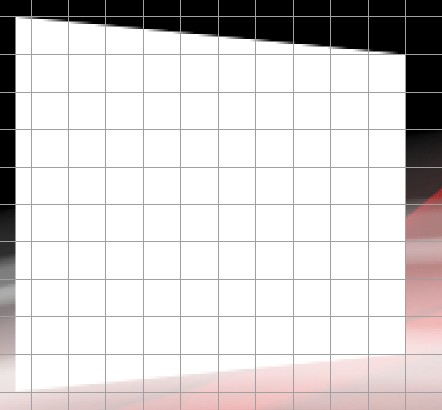
33. Move the right top corner 1 block down and the right bottom corner 1 block up
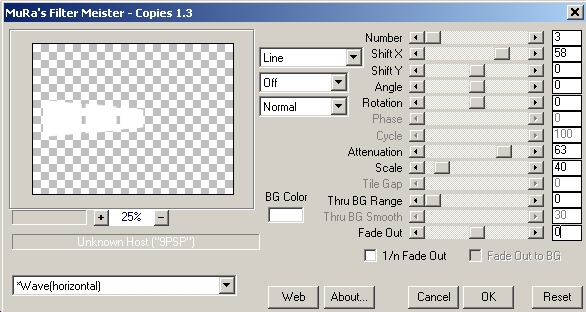
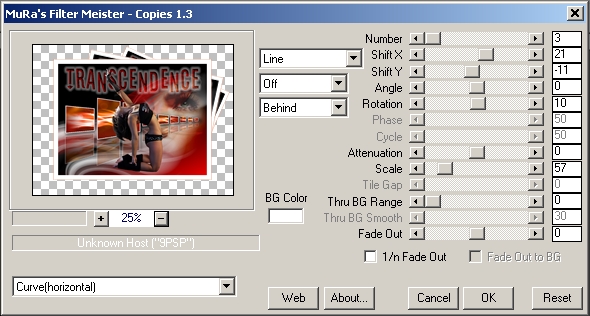
34. Remove the grid as we don't need it anymore: View, Grid 35. Effects, Plugins, Mura’s Meister, Copies as follows
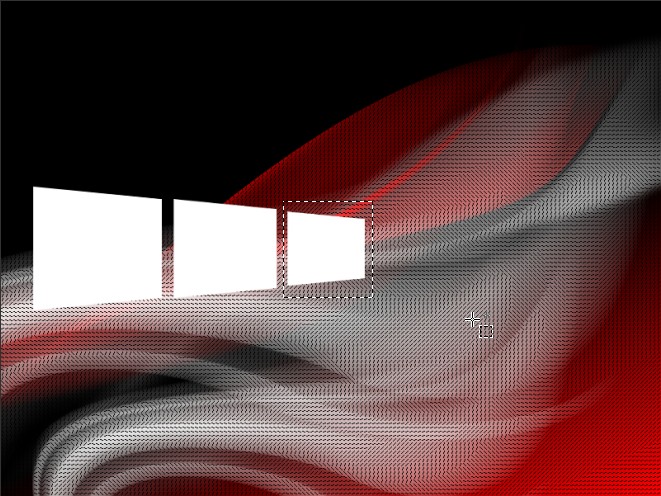
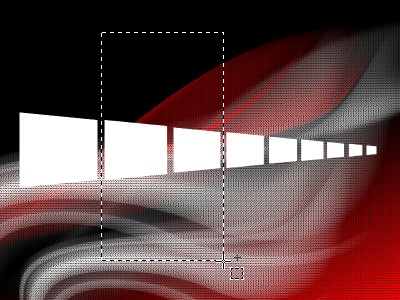
36. Draw with your Selection tool (S) a selection around the right frame
37. Right Click on your layer palette, Promote Selection to Layer (Ctrl + Shift + P) 38. Selections, Select None 39. Repeat step 35 – 38 but change Shift X to 36 in the filter Mura’s Meister, Copies 40. Repeat step 35 – 38 but change Shift X to 22 in the filter Mura’s Meister, Copies 41. Effects, Plugins, Mura’s Meister, Copies but change Shift X to 15 42. Layers, Merge, Merge down 43. Repeat this twice in order to have all the frames in the same layer 44. Draw with your Selection tool (S) a selection around the second and third frame.
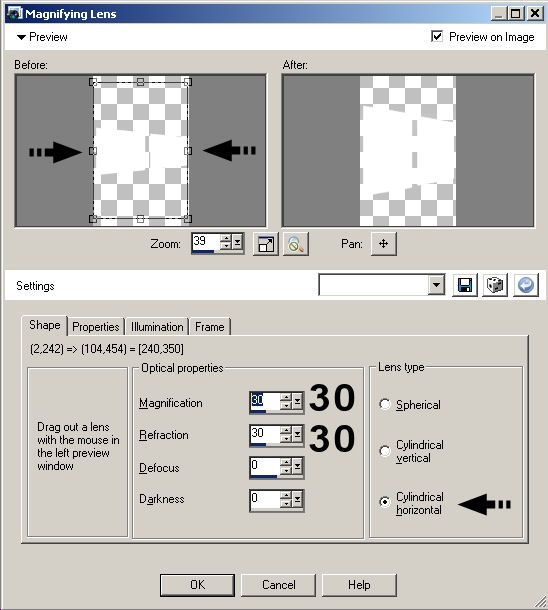
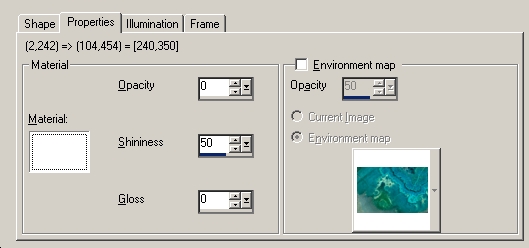
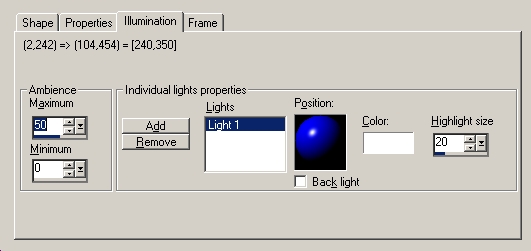
Make sure that your selection is large enough (see example)! 45. Effects, Artistic Effects, Magnifying Lens as follows.
Make sure the lens is centered on the left preview screen.
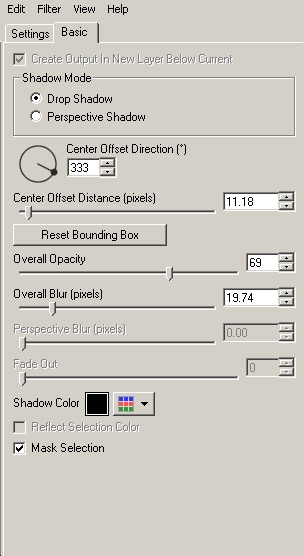
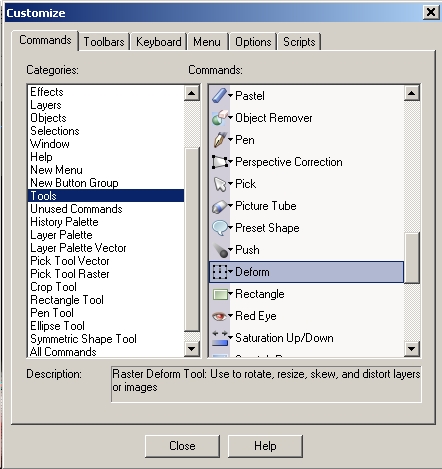
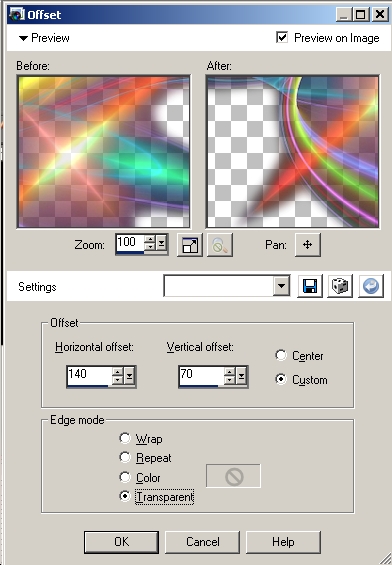
46. Selections, Select None 47. Use the Magic Wand Tool to select the first 3 frames, Match Mode on Brightness, Tolerance 100, Feather 0 48. Selections, Modify, Contract, 3 pixels 49. Open the background NVBG-transcendence 50. Copy and paste into selection 51. Selections, Select None 52. Again, take the Magic Wand Tool and select the next 3 frames 53. Selections, Modify, Contract, 2 pixels 54. Paste the background a second time into your selection (the background is still in the memory of your computer) 55. Selections, Select none 56. Once more, take the Magic Wand Tool and select the remaining 3 frames 57. Selections, Modify, Contract, 1 pixel 58. Paste the background once more into your selection 59. Selections, Select None 60. Effects, Plugins, Alien Skin Eye Candy 5: Impact, Perspective Shadow, Basic as follows 61. Layers, Duplicate 62. Image, Flip 63. Layers, Arrange, Move Down 64. Lower the opacity to 33% 65. Choose the Raster Deform tool (D) in your toolbar 66. Use the Raster Deform tool as follows
67. Open the tube AH_Transparent_0306_08 68. Image, Resize, 80% 69. Copy and paste as new layer 70. Effects, Image Effects, Offset as follows
71. In your layer palette, move this layer just above the background layer. 72. Reduce the opacity to 55%, Blend Mode Luminance 73. Open the tube Tubed_by_Monique42_3622
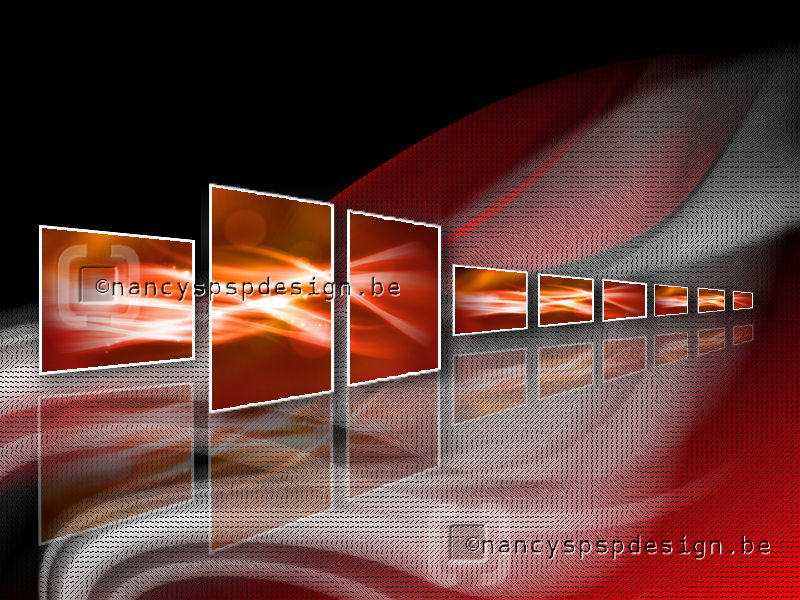
This is an extra example made by An Creatief
Lesson Transcendence was written on November 5, 2009
This site is © Copyright Nancyspspdesign.be 2007-2009, All Rights Reserved |
|
| ar |