|
RAIN ON YOUR PARADE
Materials: You can find your materials here Thank you bunches for letting me use them.
Supplies:
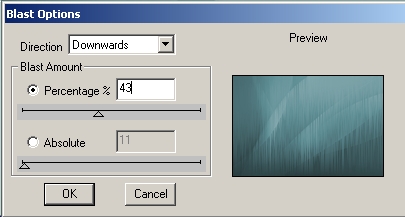
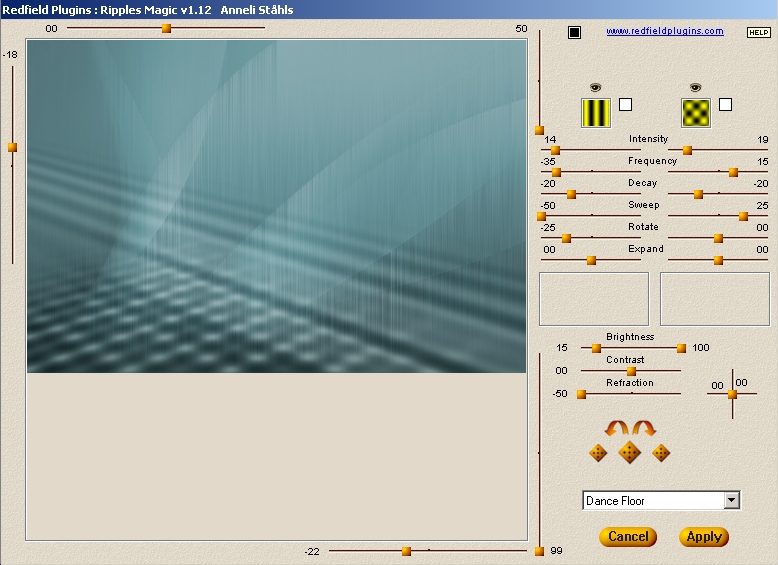
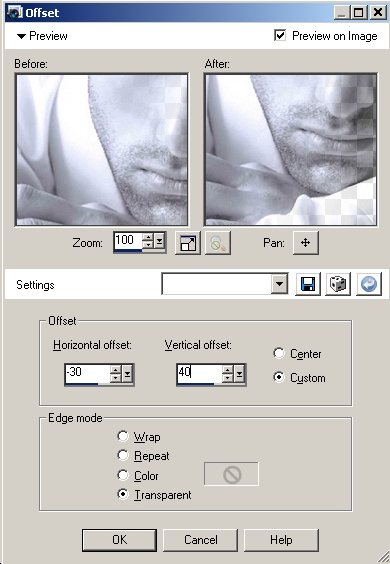
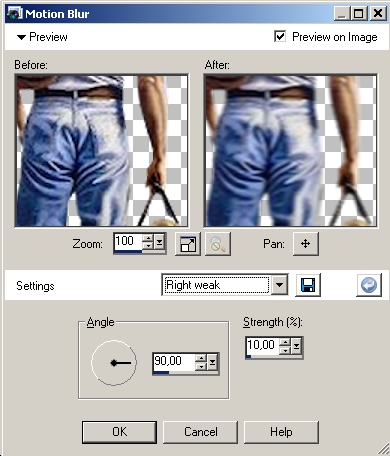
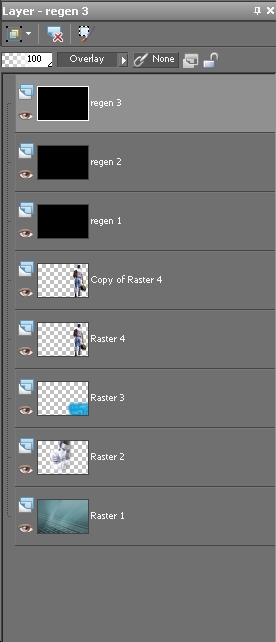
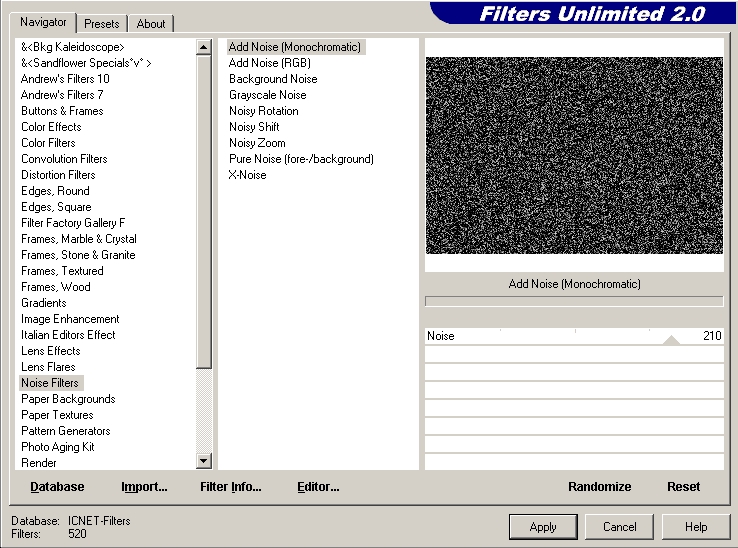
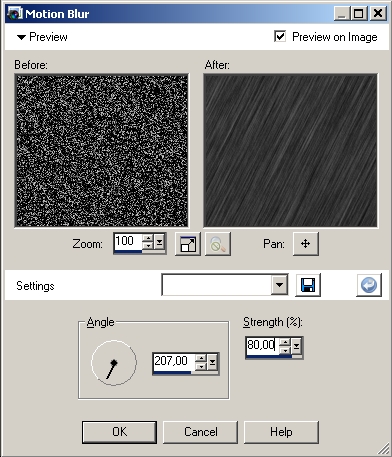
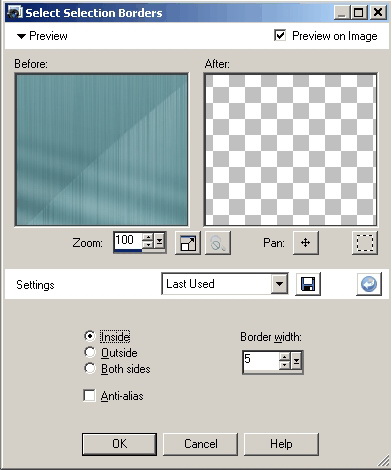
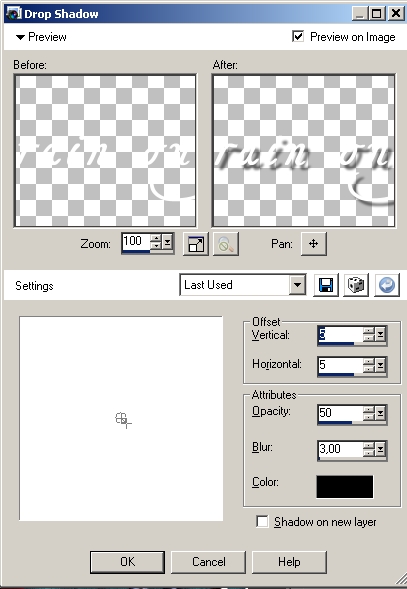
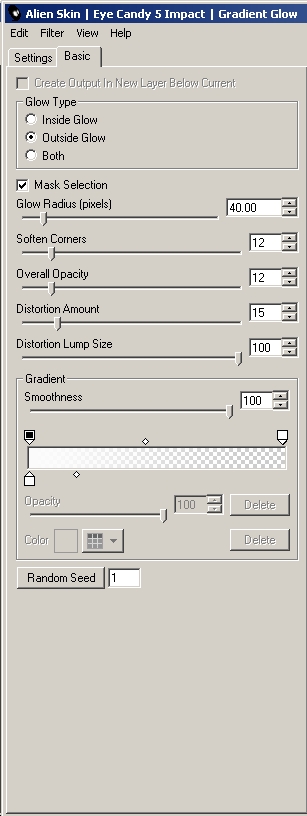
Take the arrow to know where you are in the tutorial. 1. File, New Image, 900 x 600 pixels transparent 2. Put the foreground color to black and the background color to white 3. Selections, Select All 4. Open the image ws_Aqua_Graphite 5. Edit, Copy and paste into selection 6. Selections, Select None 7. Effects, Plugins, DSB Flux Blast as follows 8. Effects, Plugins, Redfield Ripples Magic as follows 9. Shift + D to make a copy of the image. 10. Open the tube MC1080 11. Image, Resize, 90% 12. Edit, Copy and paste as new layer 13. Effects, Image Effects, Offset Horizontal -30, Vertical 40 14. Reduce in your layer palette the opacity to 45% 15. Open the tube droplet 16. Edit, Copy and paste as new layer 17. Effects, Image effects, Offset Horizontal 300, Vertical -200 18. Reduce in your layer palette the opacity to 80 % and the blend mode to Luminance 19. Open the tube Man - 039 20. Image, Resize, 150%, all layers checked 21. Edit, Copy and paste as new layer 22. Effects, Image Effects, Offset Horizontal 300, Vertical 0 23. Duplicate this layer 24. Select in your layer palette the botom layer of these two layers 25. Adjust, Blur, Motion Blur, as shown on example 26. Select the upper layer 27. Layers, New Raster Layer 28. Flood fill with black 29. Image, Resize 120%, All layers not checked 30. Layer palette, Blendmode to Overlay 31. Duplicate this layer 2 times and rename these layers rain 1, rain 2 en rain 3 32. Select in your layer palette the layer rain 1 33. Effects, Plugins, Filters Unlimited, Noise Filters, Add Noise, Monochrome, 210 34. Adjust, Blur, Motion Blur, 207, 80 35. Select in your layer palette the layer rain 2 36. Effects, Plugins, Filters Unlimited, Noise Filters, Add Noise, Monochrome, 215 37. Adjust, Blur, Motion Blur, with the same settings 38. Select in your layer palette the layer rain 3 39. Effects, Plugins, Filters Unlimited, Noise Filters, Add Noise, Monochrome, 220 40. Adjust, Blur, Motion Blur, with the same settings 41. Layer palette, leave layer rain 1 visible, layers rain 2 and rain 3 invisible 42. Select the top layer in your layer palette 43. Open the tube 1344-luzchristina 44. Image, Resize, 130%, all layers checked 45. Edit, Copy and paste as new layer 46. Effects, Image Effects, Offset Horizontal -240, Vertical -35 47. Layers, New Raster Layer 48. Selections, Select All 49. Selections, Modify, Select Selection Borders 50. Zoom in and flood fill this selection with white 51. Selections, Select None 52. Lock your foreground color 53. Activate the text tool, choose the font Tagettes, Size 50 pixels, Bold 54. Type your text ‘I’m gonna rain on your parade’ and put it as shown on example. 55. Effects, 3D-Effects, Drop Shadow, as follows: 5, 5, 50, 3 56. Layers, New Vector Layer 57. Swap foreground / background color. Foreground color is still locked. 58. Activate the text tool again, choose the font Typewriter2 , size 20 pixels 59. Type your text and place this text below the first text. 60. Layer palette, reduce the opacity to 60 % 61. Layers, Convert to raster layer 62. Layers, Duplicate 63. Put this text as shown on example just above the first text. 64. Layer palette, reduce the opacity to 75 % 65. Duplicate this layer once more 66. Put this text as shown on example just above the previous text. 67. Layer palette, Opacity 100 % 68. Layers, Merge, Merge Down 69. Effects, Plugins, Alien Skin Eye Candy 5: Impact, Gradient glow, Basic as follows 70. Image, Resize, 90%, All layers checked 71. Now, we will prepare our animation. Edit, Copy Special, Copy Merged 72. Open the saved background (see step 9) 73. Layers, New Raster Layer 74. Put your signature 75. Layer palette, Select the bottom layer 76. Edit, Paste as New Layer 77. Layers, Merge, Merge Visible 78. Save as PSP Animation Shop file (*.psp) and name it animation 1 79. Edit, Undo
80. Return to your original work, lock in your layer palette layer rain 1 en open layer rain 2 81. Edit, Copy Special, Copy Merged 82. Paste as new layer on your background 83. Layers, Merge, Merge Visible 84. Save as PSP Animation Shop file (*.psp) and name it animation 2
85. Edit, Undo
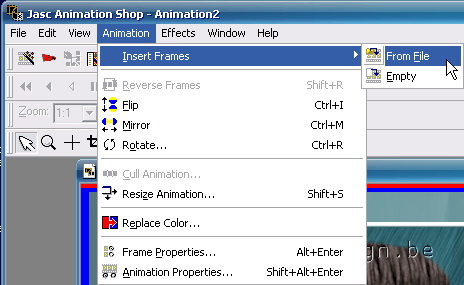
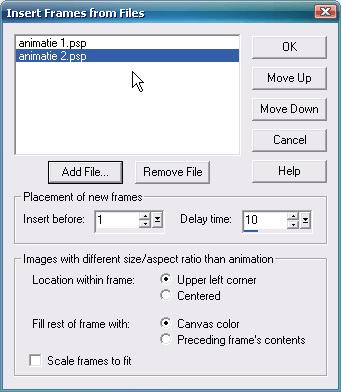
86. Return to your original work, lock in your layer palette layer rain 2 en open layer rain 3 87. Edit, Copy Special, Copy Merged 88. Paste as new layer on your background 89. Layers, Merge, Merge Visible 90. Save as PSP Animation Shop file (*.psp) and name it animation 3 Now we'll make the animation 91. Start Animation Shop and open animation 3 (File, Open) 92. Add the other animations 93. View, Animation to see the animation 94. Save as gif.
This is an extra example made by An Creatief
Lesson Rain on your parade was written on August 31, 2009
This site is © Copyright Nancyspspdesign.be 2007-2009, All Rights Reserved |
|
|
|