|
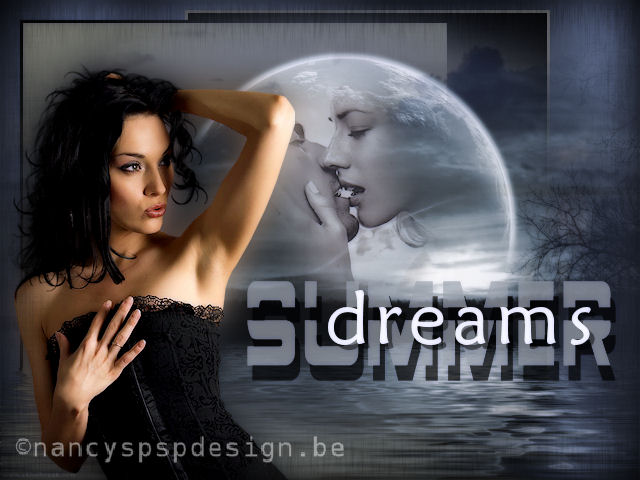
Summer dreams
The materials you
can find here. I don't know who
made the tube from the couple. Supplies:
Take the arrow to know where you are in the tutorial. 1. File, new image, 640 x 480 pixels, transparent 2. Foreground color #6d7ea7 and flood fill your canvas with the foreground color 3. Effects, plug-ins,
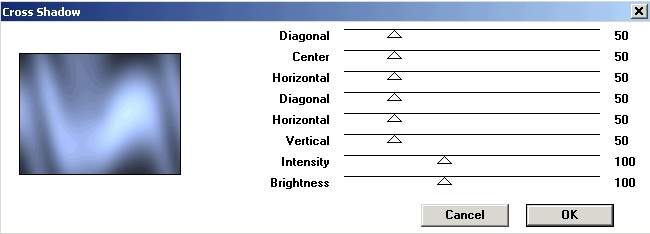
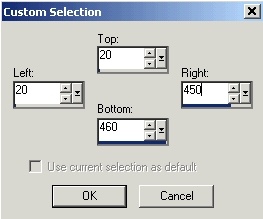
Graphics Plus, Cross Shadow as follows 4. Layers, new raster layer 5. Background color black and foreground color #9b9c8d 6. Selection, custom
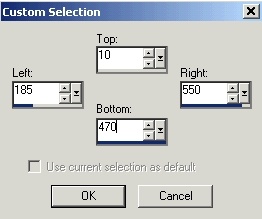
selection, 7. Flood fill this selection with foreground color 8. Selections, modify, contract with 3 pixels 9. Change fore- and background color and flood fill the selection with black 10. Selections, select none 11. Selection, custom
selection, with these settings: 12. Flood fill this selection with foreground color 13. Selections, modify, contract with 3 pixels 14. Again, change fore- and background color en flood fill the selection with #9b9c8d 15. Selections, select none 16. Effects, plug-ins,
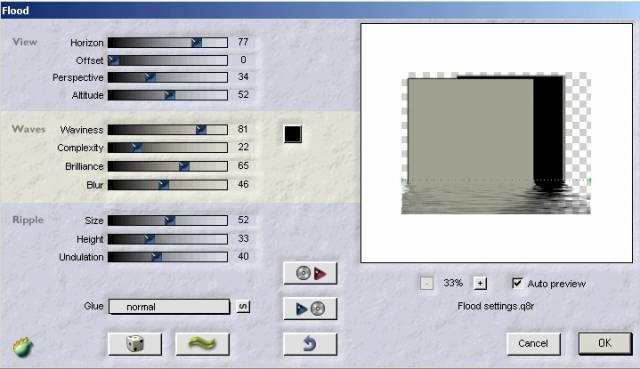
Flaming Pear, Flood as follows 17. Layers, new raster layer 18. Selections, select all 19. Open the tube "SS_172[1]" 20. Copy and paste into selection 21. Layers, new raster layer 22. Open the tube "Fantasy-0159" 23. Copy and paste into selection 24. Selections, select none 25. Adjust, hue
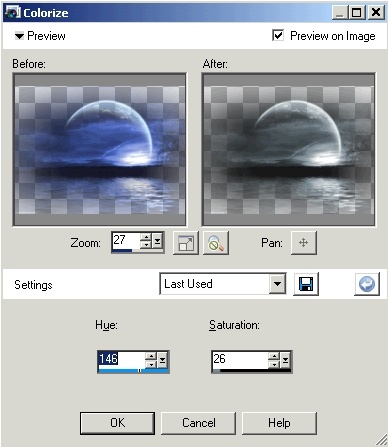
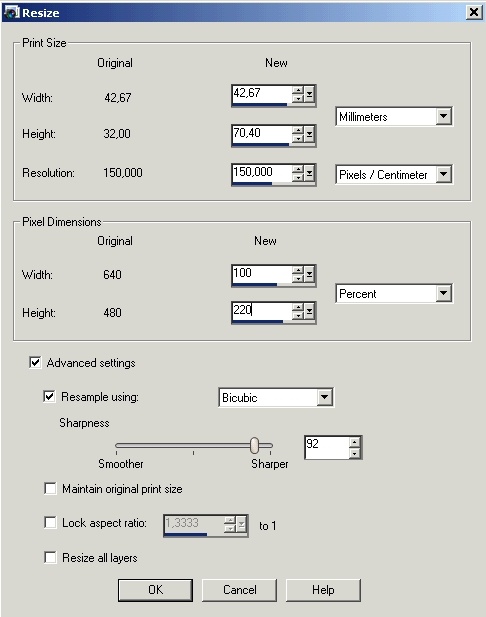
and saturation, colorize as follows 27. Image, resize, 22% 28. Copy and paste
as new layer, place into the globe as shown 30. Open the tube "Azyzam-woman3-november2007" 31. Image, resize, 70% 32. Copy and paste as new layer, rename this layer woman 33. Duplicate this layer 34. Effects, photo-effects,
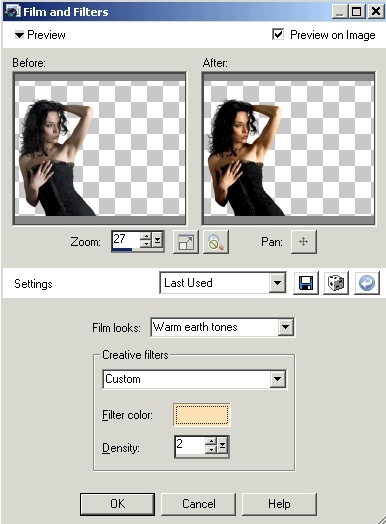
film and filters, as follows (color #ffdaad) 35. Choose in your layer palette the layer "woman" 36. Adjust, blur, gaussian blur, 15 37. Layers, merge, merge visible 38. Layers, new raster layer 39. Selections, select all 40. Open the frame Lelanie's_blend002, copy and paste into selection 41. Selections, select none 42. Activate the text tool and choose the font Borg-9, size 60 pixels 43. background color #9da4ae, lock your foreground color 44. Type the text "Summer" 45. Image, resize,
as follows and place your text as shown on the example 46. Effects, 3D-effects, drop shadow with these settings: 15, 5, 100, 0, black 47. Put in your layer palette the opacity at 70% 48. Activate again the text tool and choose the font Maiandra GD, size 75 pixels 49. background color white, lock your foreground color 50. Type the text
"dreams" and put it over "summer" 51. Effects, 3D-effects, drop shadow with these settings: 5, 5, 50, 0, black 52. Layers, merge, merge visible 53. Effects, plug-ins,
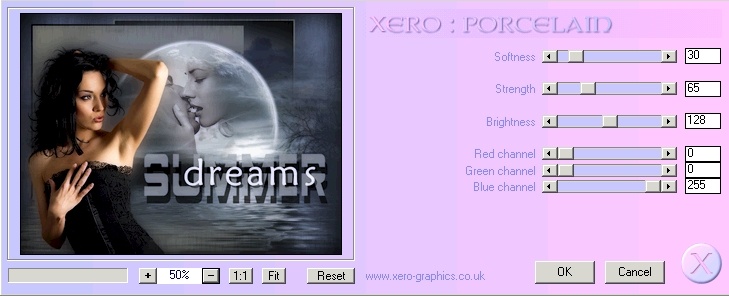
Xero Porcelain with these settings 54. Don't forget your signature and save as jpg.
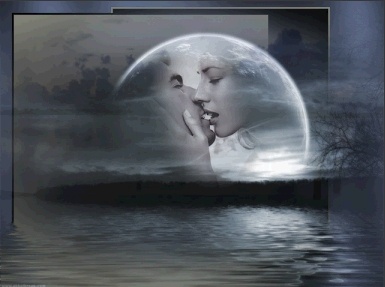
Extra example made by An Creatief
Les Summer dreams was written on April 3, 2008
This site is © Copyright Nancyspspdesign.be 2007-2008, All Rights Reserved |
|
| ar |