|
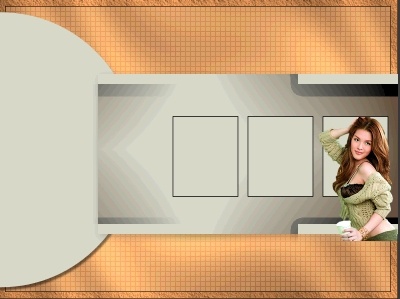
Women
For the materials,
click here. Supplies: Preparation :
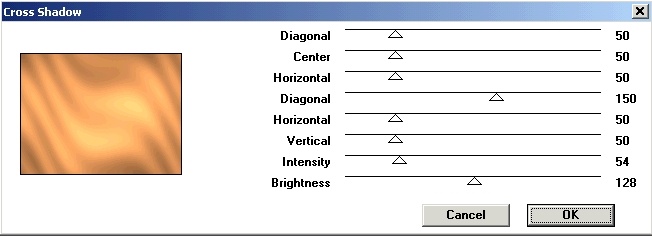
Take the arrow to know where you were in the tutorial. 1. File, new image, 800 x 600 pixels, transparent 2. Foreground color #d78d51 and background color #d3d4c6 3. Flood fill with color #d78d51 4. Effects, plug-ins, Graphics Plus, Cross Shadow as follows 5. Selections, Select all 6. Selections, Modify, Contract, 15 pixels 7. Effects, plug-ins,
Penta.com, Dot and Cross as follows 9. Effects, plug-ins,
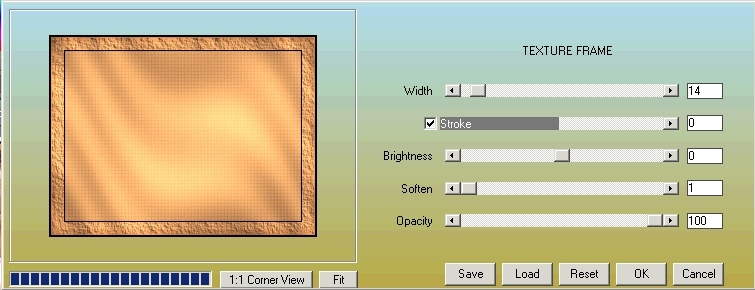
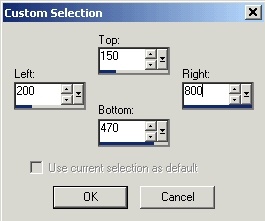
AAAframes, Texture Frame as follows 10. Selections, Select none 11. Layers, New Raster Layer 12. Swap fore- and background color 13. Selection, Custom
selection 14. as follows 15. Fill the selection with color #d3d4c6 16. Effects, 3D effects, Drop shadow 6 - 3 -37 - 25 black 17. Selections, select none 18. Change the background color to #604e3a. 19. Effects, Plug-ins, Filter Simple, Quick Tile 20. Layers, New Raster Layer 21. Swap foreground color and background color and lock your foreground color 22. Select in the toolbar Tools the ellipse tool, make a circle
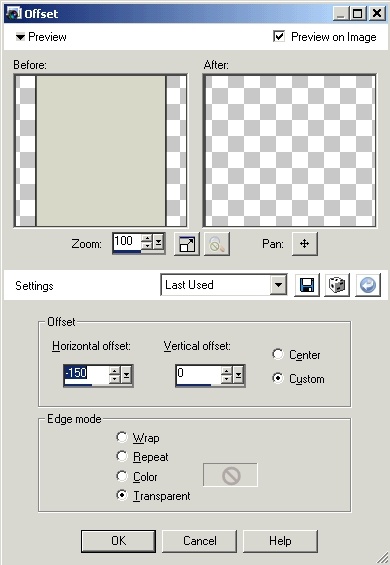
and place as follows 23. Effects, 3D effects, Drop schadow 6 - 3 - 50 - 5 black 24. Layers, Arrange, Move down 25. Select in your layer palette the top layer 26. Layers, New Raster Layer 27. Change your foreground color to black 28. Draw a random rectangle 29. Put the setting in your tool options palette as follows 30. Rename this layer Square 1 31. Layers, Duplicate 32. Effects, Image
Effects, offset as follows 33. Rename this layer Square 2 34. Layers, Duplicate 35. Effects, Image Effects, offset with the same settings as above 36. Rename this layer Square 3 37. Select in your layer palette Square 1 38. Open the tube F-DEC2007-20 39. Image, Resize, 45 % 40. Copy and paste as new layer 41. Place the tube as follows 42. Select again Square 1 in the layer palette 43. Click with the magic wand tool in the square 44. Selections, Invert 45. Select the layer with the tube and hit delete 46. Selections, Select none 47. Layers, Duplicate 48. Go to the lowest of these two layers in your layer palette 49. Adjust, Blur, Gaussian blur, 51 50. Select in your layer palette Square 2 51. Open the tube @nn_210607_photos_094_angelinaJ2_tdstudio_small 52. Image, Resize, 60 % 53. Copy and paste as a new layer 54. Place the tube in the second square 55. Select again Square 2 in your layer palette 56. Click with the magic wand tool in the square 57. Selections, Invert 58. Select the layer with the tube and hit delete 59. Selections, Select none 60. Layers, Duplicate 61. Go to the lowest of these two layers in your layer palette 62. Adjust, Blur, Gaussian blur, 51 63. Select in your layer palette Square 3 64. Open the tube Gerry-Lady66-5december2007 65. Image, Resize, 35 % 66. Copy and paste as a new layer 67. Place the tube in the third square 68. Select again Square 3 in your layer palette 69. Click with the magic wand tool in the square 70. Selections, Invert 71. Select the layer with the tube and hit delete 72. Selections, Select none 73. Layers, Duplicate 74. Go to the lowest of these two layers in your layer palette 75. Adjust, Blur, Gaussian blur, 51 76. Select in your layer palette the top layer 77. Layers, New Raster Layer 78. Take the brush
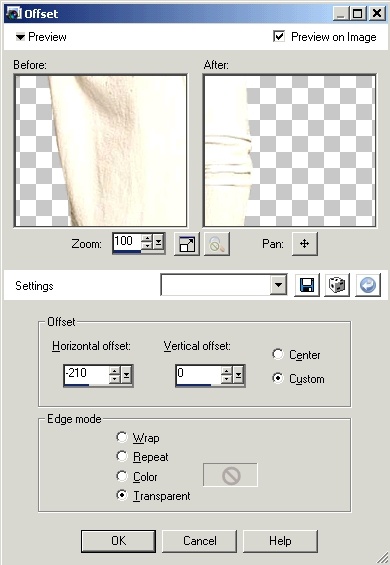
@-EPS030-12 as follows 79. Put the foreground color to #d78d51 and place the brush a few times in the circle 80. Effects, Distortion effects, Wind, from left, strenght 100 81. Effects, Distortion effects, Wind, from right, strenght 100 82. Layer palette, Blend mode, Dodge 83. Take the tube ©crystal_H30806 84. Image, Resize, 120 % 85. Copy and paste as new layer 86. Effects, Image
effects, Offset as follows 87. Effects, Plug-ins,
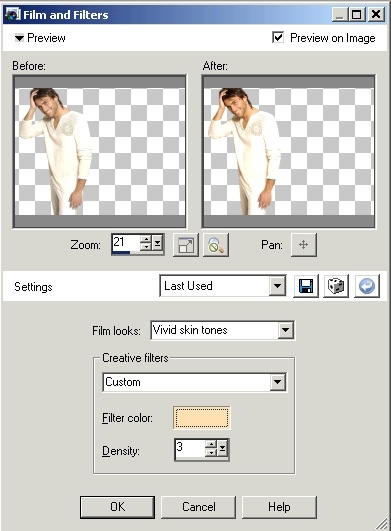
Film and Filters, as follows (color #ffdaad) 88. Layers, Duplicate 89. Layer palette, select the lowest of these two layers 90. Adjust, Blur, Gaussian blur, 5 91. Select in your layer palette the bottom layer 92. Layers, New raster layer 93. Place your brush 5 times in the orange part as shown on example 94. Layer palette, Blend mode, Dodge 95. Layer palette, Select layer raster 2 96. Layers, New raster layer for the text 97. Select the text
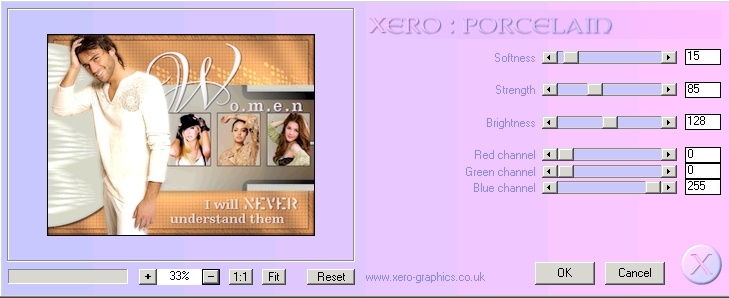
tool, switch your font to LoversQuarrelROB, 320 pixels, 98. Switch your font to EgyptienneF65-Bold, 60 pixels and type "o.m.e.n" 99. Open the WordArt, copy and paste 100. Place the WordArt as shown on the example 101. Layers, Merge, merge all 102. Effects, Plug-ins,
Xero Porcelain, as follows 103. Don't forget
your signature and save as jpg.
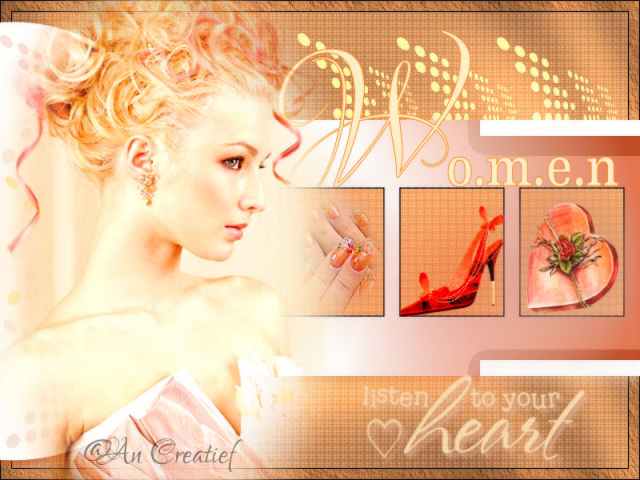
This is an extra example made by An Creatief
Les Women was written on June 8, 2008
This site is © Copyright Nancyspspdesign.be 2007-2008, All Rights Reserved |
|
| ar |